10 Ways To Tie A Turban/ Headscarf

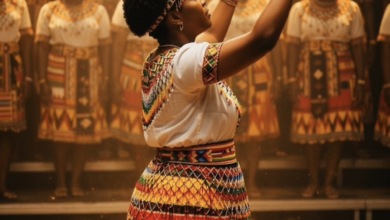
A tribute to the 20s and 40s, turban headpieces are the latest recharged fashion accessory for the summer season. Turbans have the ability to make a hip, psychedelic and avant-garde hair statement wrapped around any ‘do. A great way to get your hair out of your face, cover up day old hair or spice up a hair bun or ponytail, these chic turbans are a fresh way to add funky textures like silk, velour, cotton and lycra with bold colors, styles and patterns to any outfit. There are no rules when it comes to sporting an alluring turban: wrap it up multiple times, tie it in a bow, braid it up or simply knot it around your head. Let your freak flag fly as your hair does all the talking this summer with a enticingly eye-catching, colorful turban. The following are 10 ways wit steps or instructions on how to get your head geared up the right way. Enjoy!
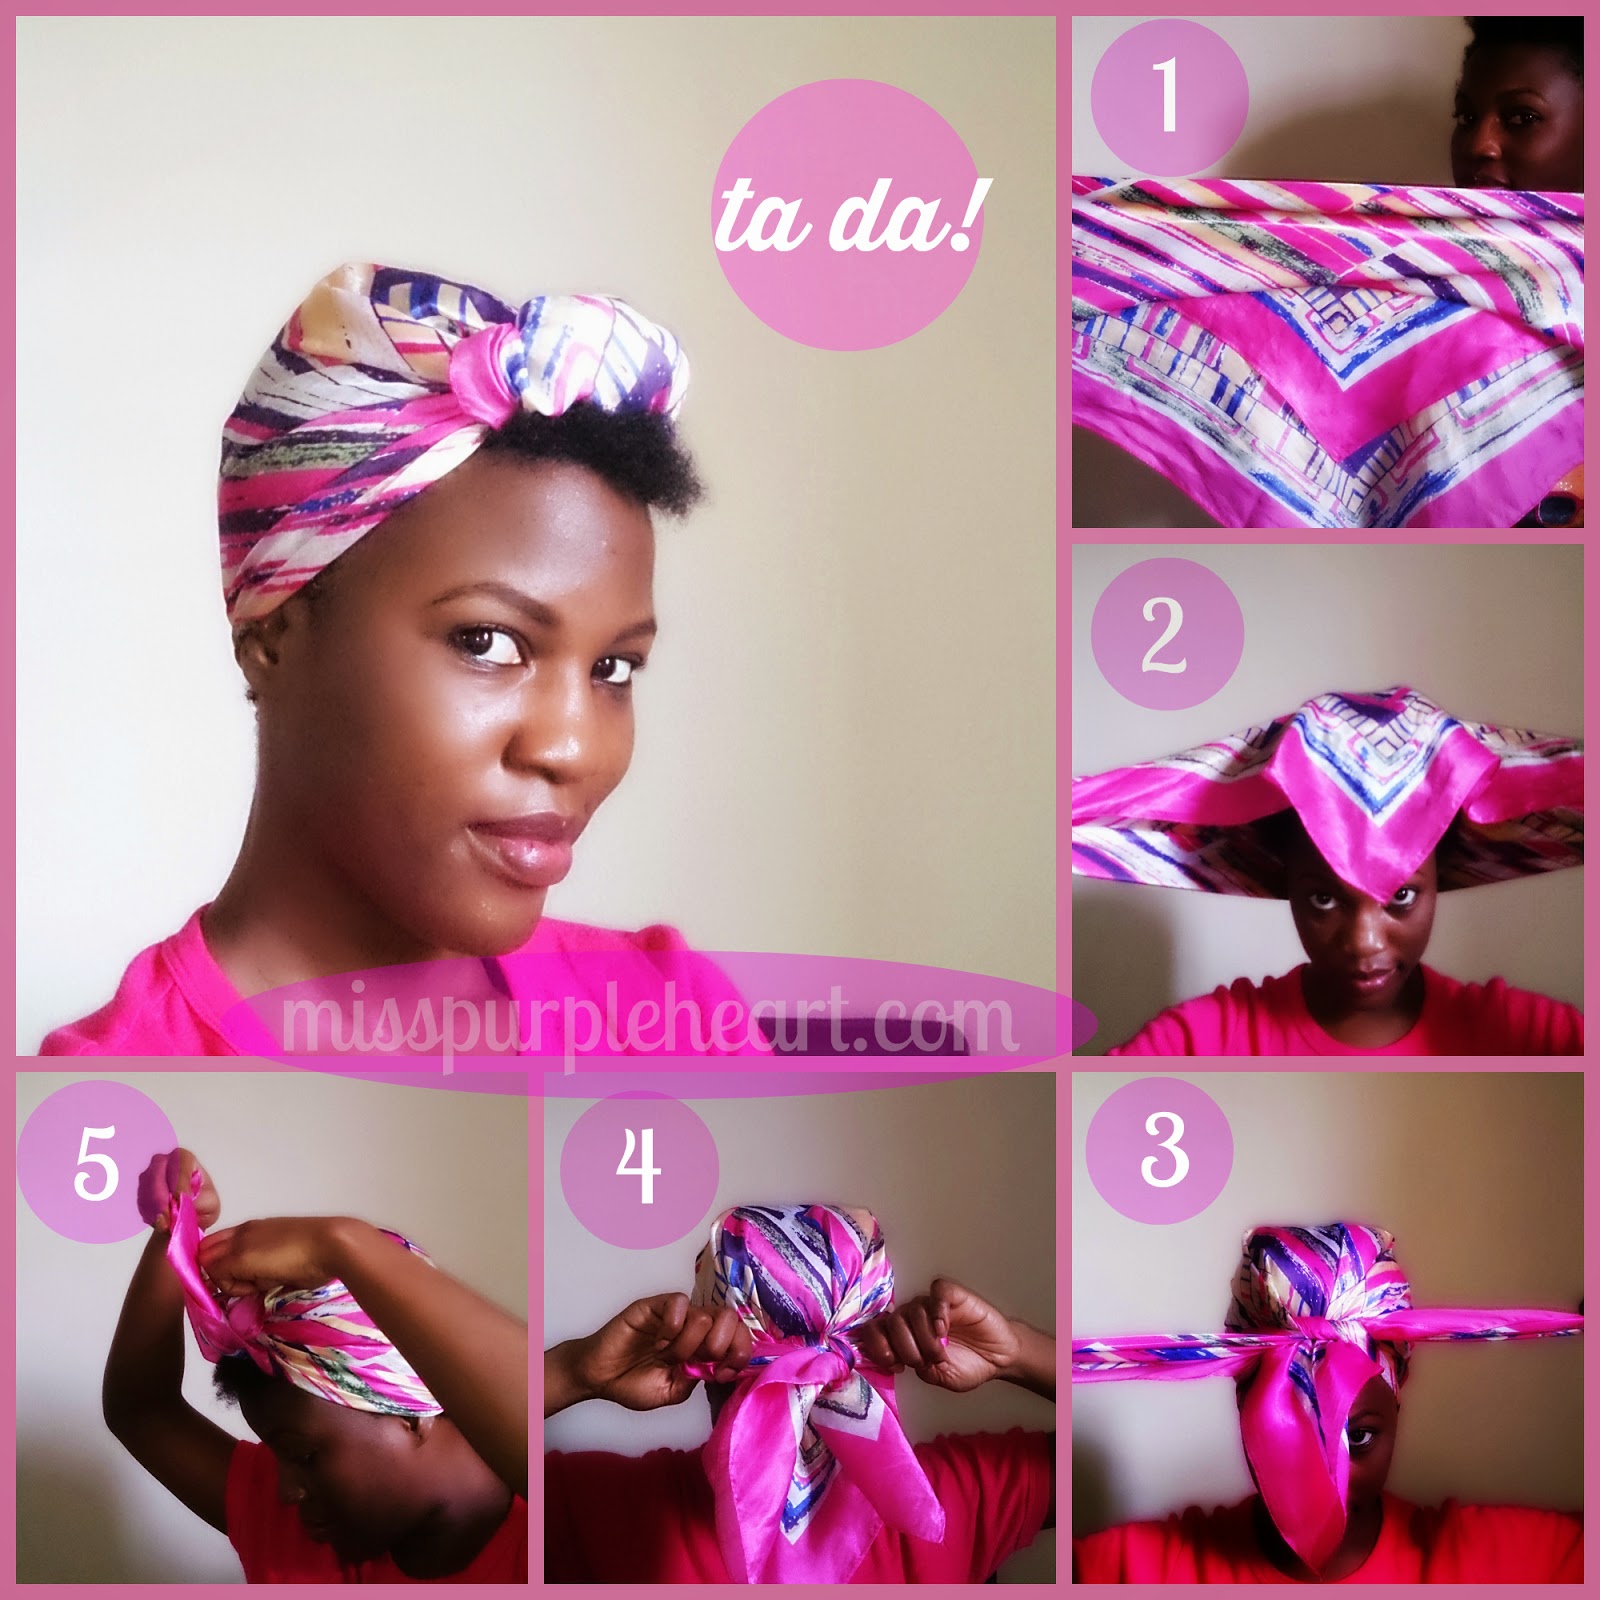
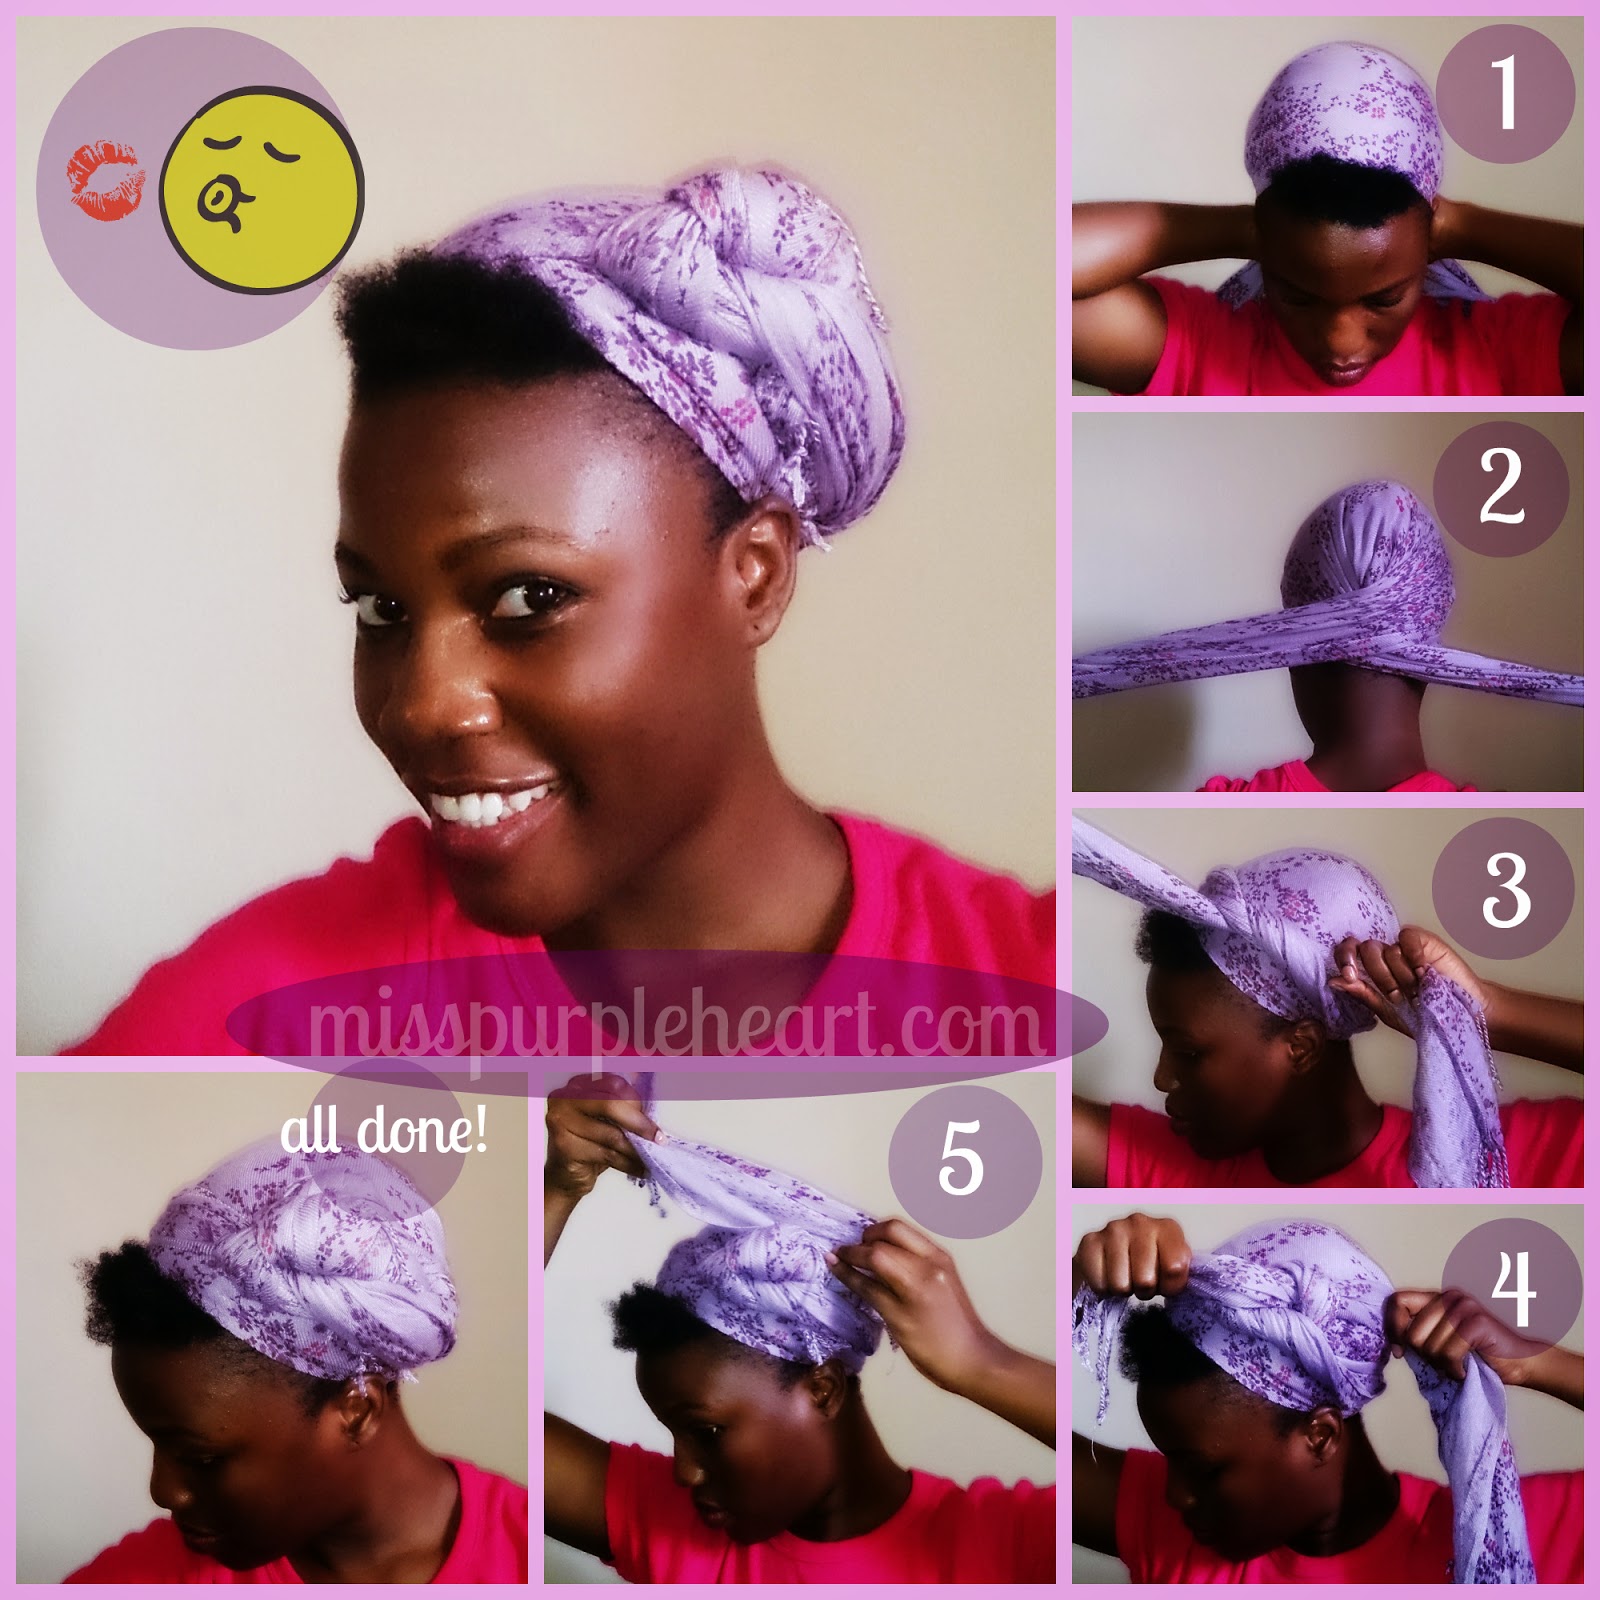
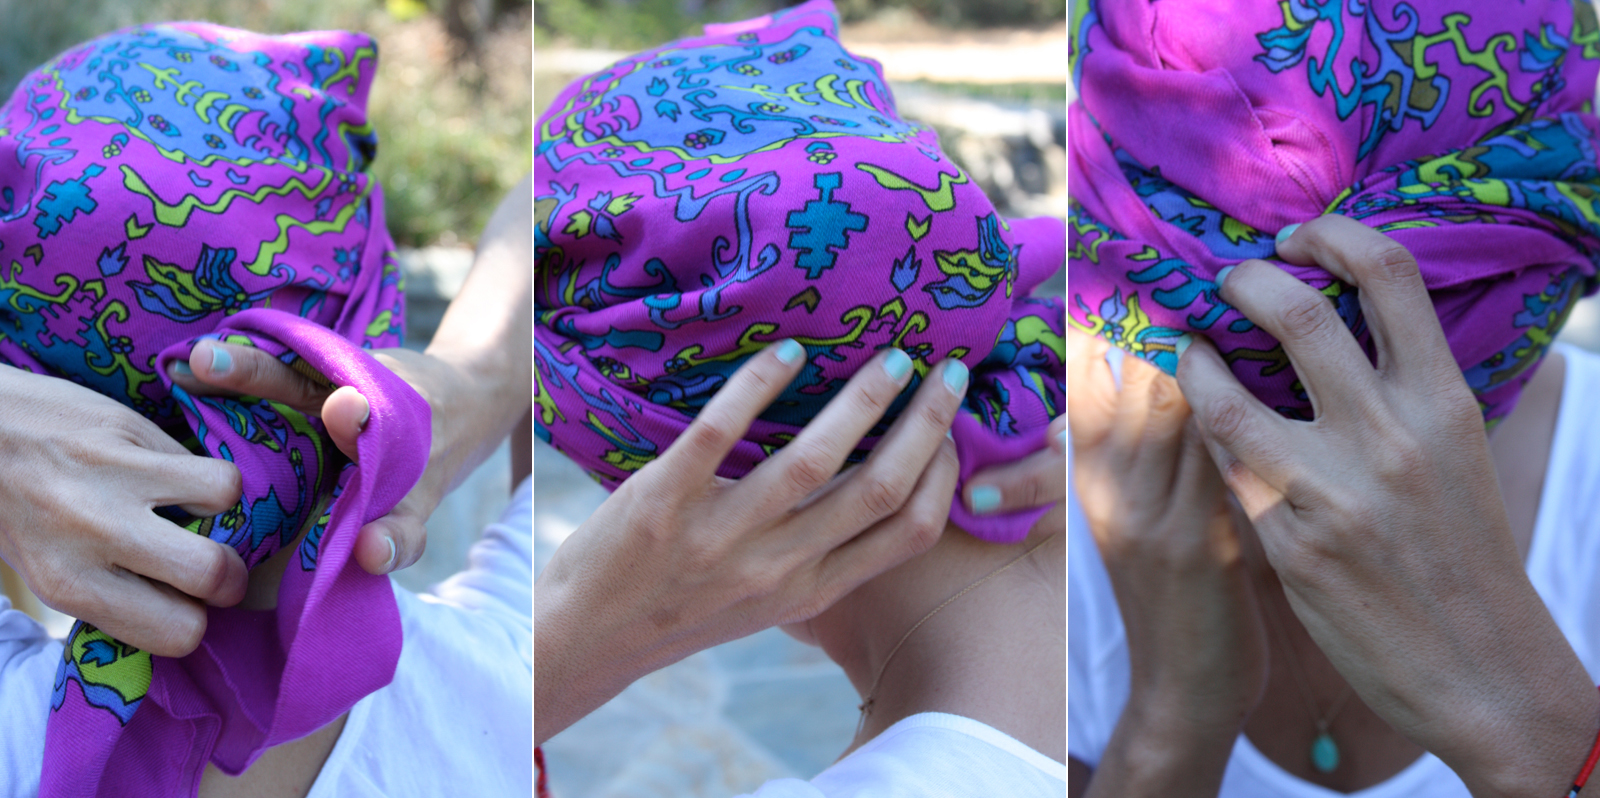
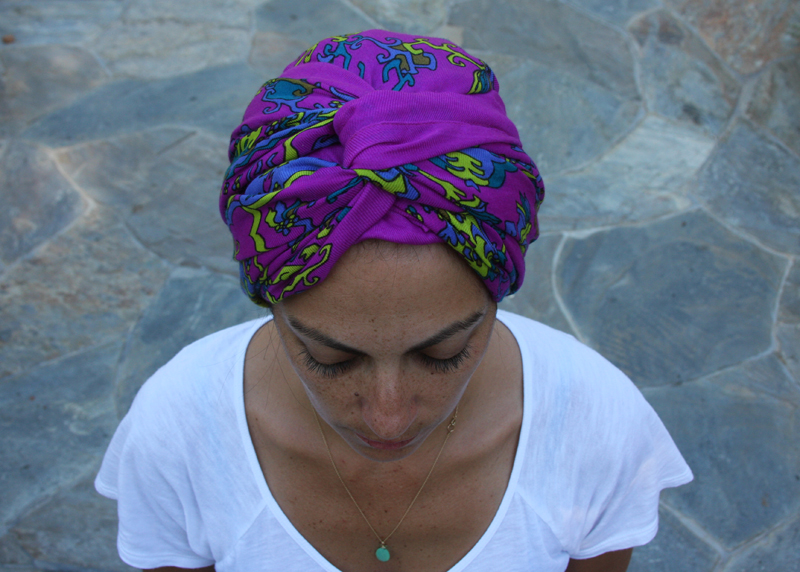
Look 1: Mini Turban

Step 1: Fold a square scarf into two, to form a triangle (could be silk or cotton scarf…i used silk)
Step 2: Place at the back of your head, leaving the tapered end to fall towards your forehead.
Step 3: Tie a knot and make sure the tapered end is firm and secure, tuck in any loose cloth at the top.
Step 4: Take the tapered end with any of the sides, then twist.
Step 5: Make a small fold at the back and tuck the end of the twist inside it.
Look 2: Front Tuck
Step 1-3: Same as Look 1 above
Step 4: Tie a bow with the two ends
Step 5: Fold the bows inwards and tuck the tapered ends backwards.
Look 3: Side Bun
Step 1: Using a rectangular scarf (preferrably cotton) fold into two (forming a narrow rectangle)
Step 2: Start from the back of the head and tie at the side.
Step 3: Twist the two ends together (make sure the twist is tight)
Step 4: Roll the twisted up piece around itself
Step 5: Place your hand in the middle so that the bun stays flat.
Look 4: Wrap Around
Step 1: Fold your rectangular scarf into a slimmer rectangle
Step 2: Start from the front and cross the two ends at the back.
Step 3: Wrap one end across your head to the other end
Step 4: Cross them at the point they meet, and wrap the second end to the other side of your head.
Step 5: Tuck the longer end (or shorter end, whichever you’re comfortable with) at the back, and tuck any loose piece of the loose end to your satisfaction. (Arrange, push and tuck till you get the look you’re happy with)
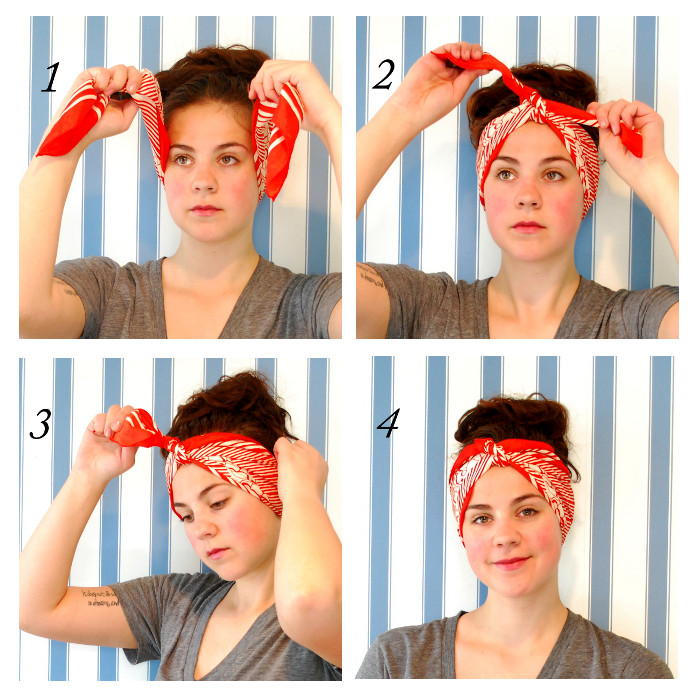
Look 5: Side Tuck
Step 1: With a rectangular scarf, start from the front (leaving hair out is optional)
Step 2: Cross at the back
Step 3: Take to the side and tie the two ends together
Step 4: Tie a second knot (not too tightly)
Step 5: Tuck in the shorter end at the back of the knot, then bend and tuck in the longer end…tuck tuck tuck arrange tuck…till it’s firm and in place.
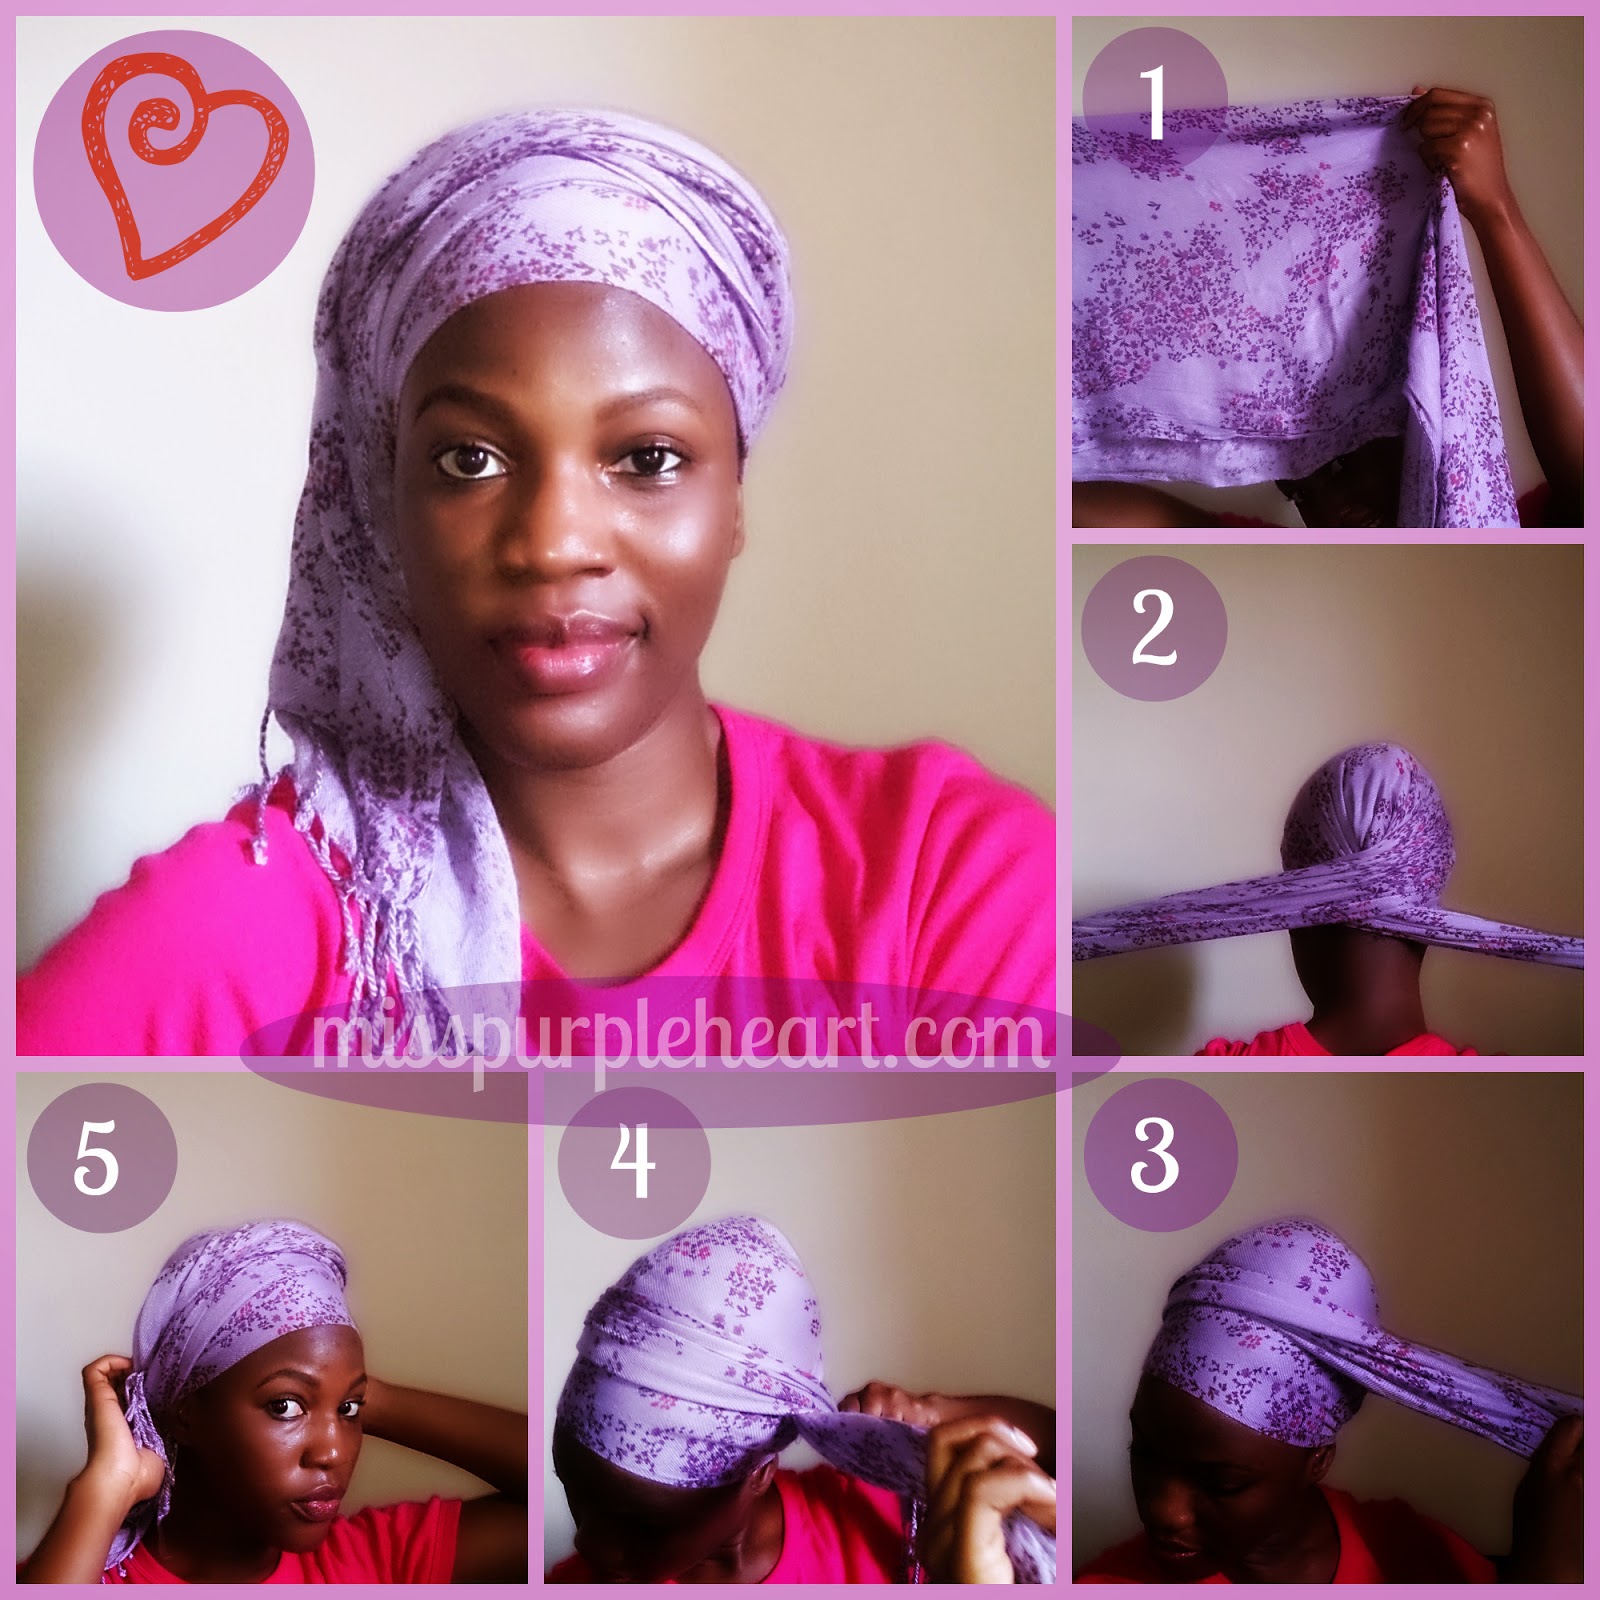
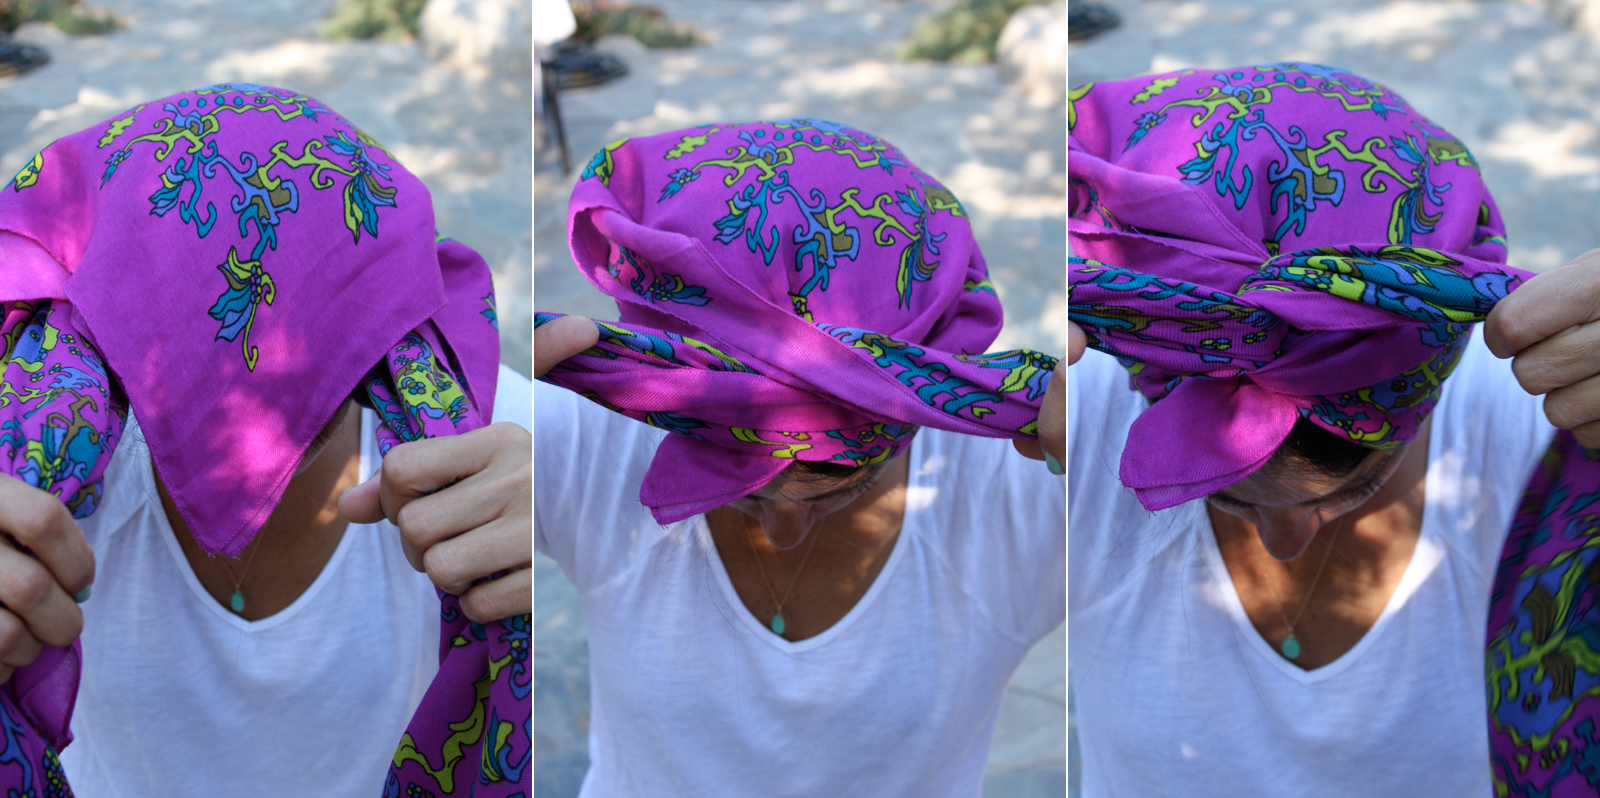
Look 6: Signature Look

Step 1: Pull two diagonal ends of your scarf together to form a triangle (you should have 3 ends.)
Step 2: Place the scarf over the nape of your head so that one end drapes over your face, and the other two ends are arms length.
Step 3: Pull the two arms length ends to the middle of your forehead and tie together, leaving the third piece still draped under. Make sure you have a tight and secure knot (but not too tight).
Step 4: Pull the third piece back from your face and tie the other two pieces together on top of that piece.
Step 5: Then tie the two pieces together again.
Step 6: With the remaining fabric ends, tuck them back into the original knot, making sure it’s securely tucked. BOOM! Welcome to Juniverse!
Look 7: Fun Front Bun
Step 1: Repeat steps 1-3 from The Signature Look.
Step 2: Twist all 3 ends together and then create a tight bun.
Step 3: Tuck the loose ends securely underneath the bun.
Step 4: Once secured tightly play with your bun to make it as big or small as you want, but take it from us, the bigger the better!
Look 8: Big Chilled Wrap
Step 1: Repeat steps 1-3 from the previous looks.
Step 2: Take the draped piece from your face and tuck underneath the knot of the other two ends (the piece should no longer be visible before moving on to the next step).
Step 3: Keep pulling the remaining two ends tightly to create the shape you desire.
Step 4: Now pull the two ends to the back of your head, tie a knot, and bring the remaining fabric to the front, tucking them into the sides of the turban so no fabric is showing. And voila!
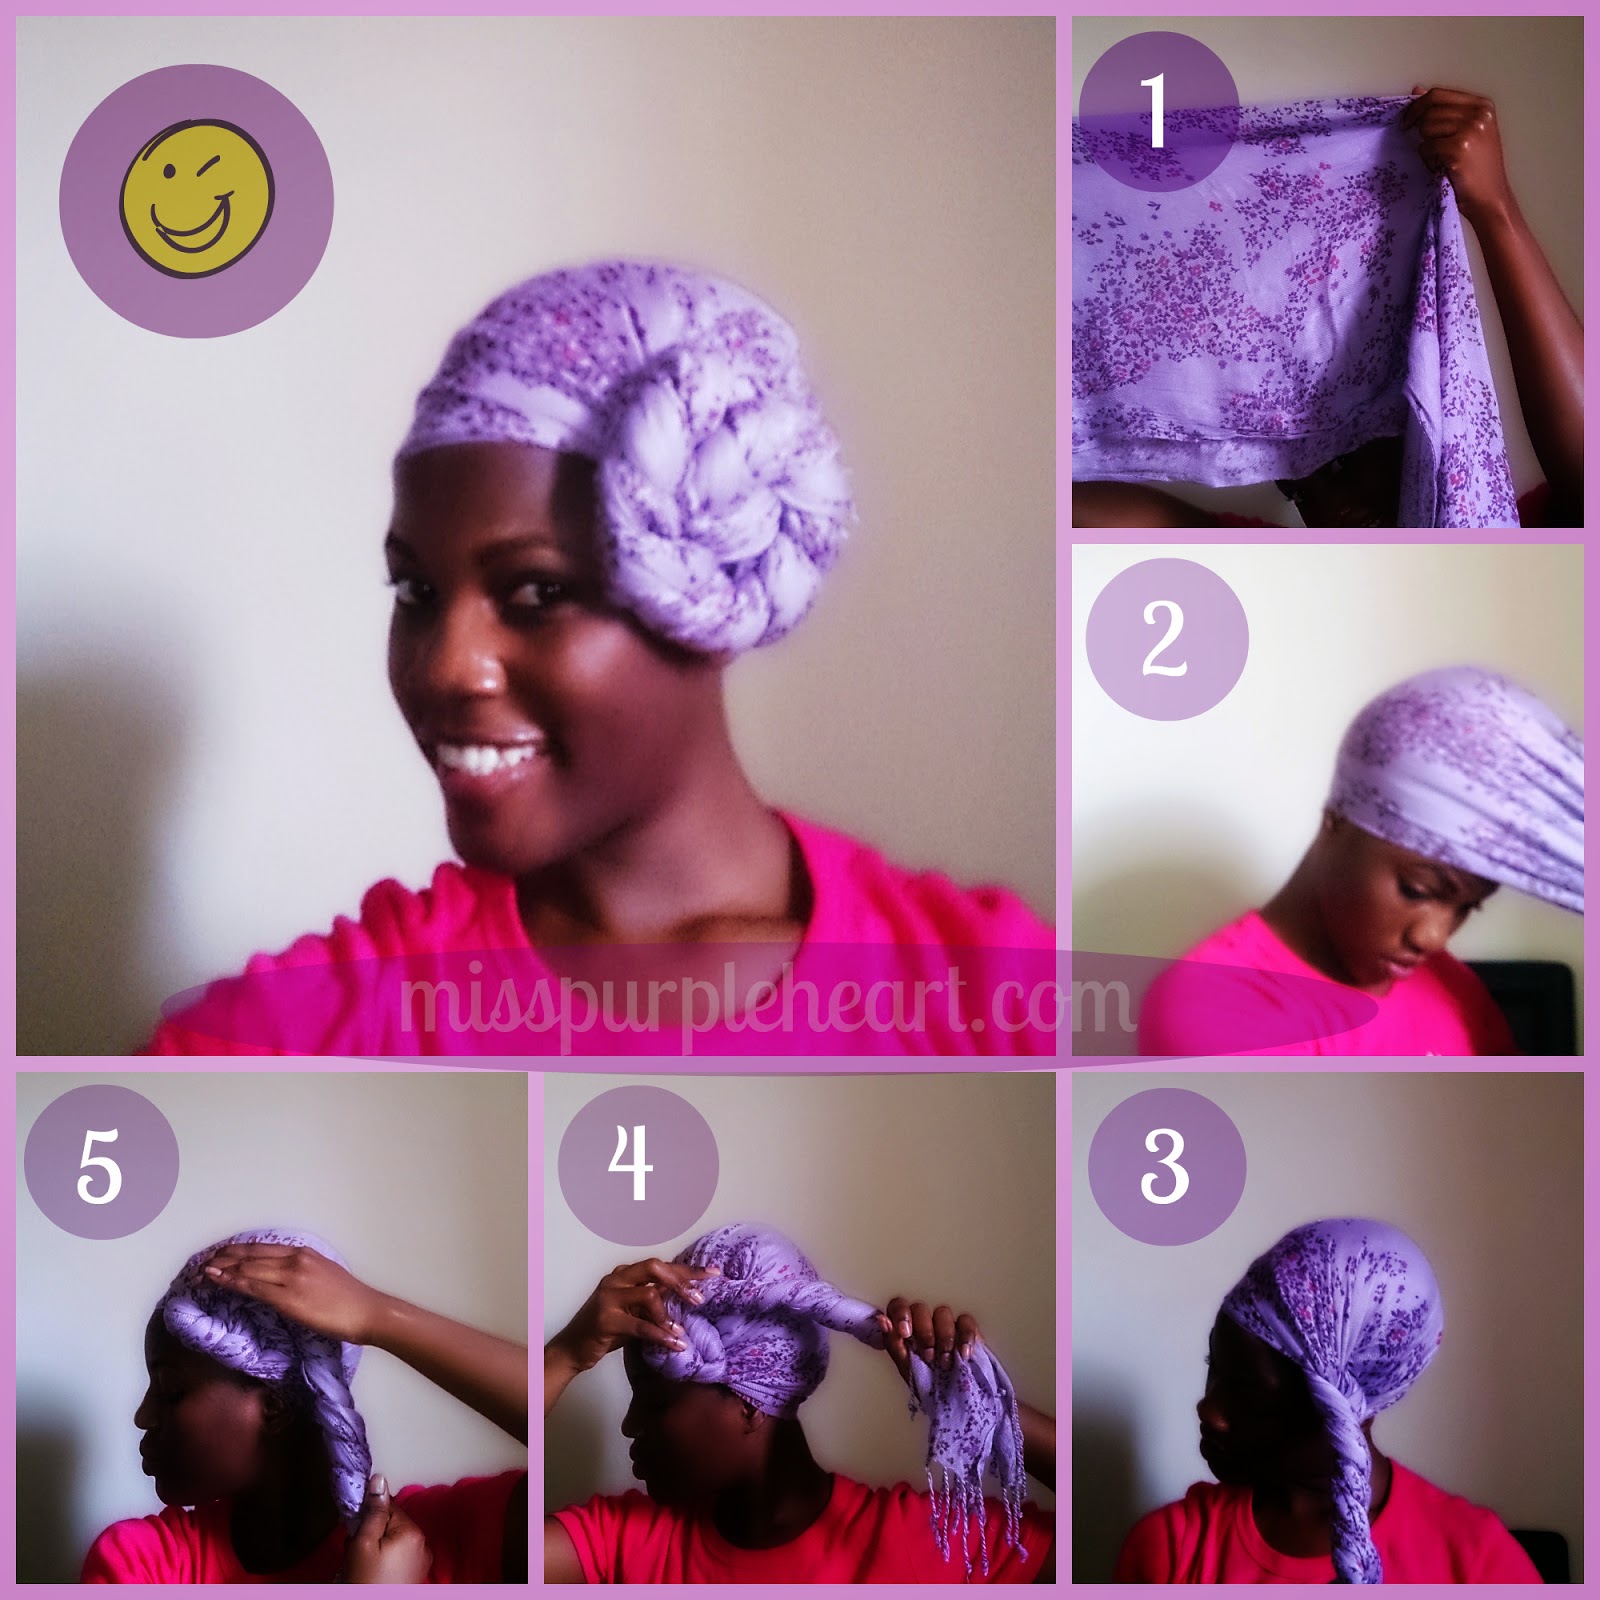
Look 9: Summertime Chic
Step 1: Before you start, tie your hair in a bun or ponytail. Fold a large square scarf in half into a triangle. Lay the scarf on your head with the center point of the triangle facing forward and the sides hanging down each of your shoulders. Making sure most of your hair is covered, grasp the length of each side and bring them to the top of your head, twisting twice to create a “knot”.
Step 2: Once you’ve twisted the ends twice into a knot, bring both sides together to the back of your head and tie it tight. Tuck all your loose ends under the back and front of the turban.
Step 3: Ta-Da, you’ve just made a turban! You can also create a turban-like headband using a rectangular scarf by repeating the same steps without covering all of your hair. Don’t forget the double twist and happy wrapping!
Look 10: Turn Turban
This one I find looks best with your hair up. Using a square scarf, fold the scarf in half diagonally, then in half again, and again, until you get the desired width of scarf. Start with the scarf behind your head and one end in each hand. Knot the scarf in the front twice. Tuck the ends back into the sides of the scarf.